
Vest Documentation
February 10th, 2022:
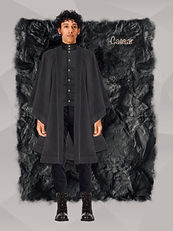
My senior project is focused on the construction aspect of theatrical costuming, not on the design of the costume. As the costume designer Kevin provided me with his costume rendering for Julius Caesar as well as the patterns and materials he wanted used to create this costume. Being focused on construction it is my responsibility to bring the costume designers renderings to life and give them a tangible, wearable form.

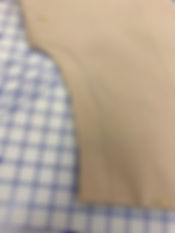
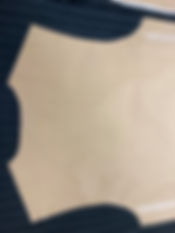
After checking the measurements of the vest pattern against the actors, I noticed that the actor had a very rectangular torso; 42″ Chest and 42″ Waist. I chose to start with the size 46 vest because it had a 42″ waist and I figured its always easier to take in any excess for the muslin than to add fabric. I used the pattern paper directly on the muslin to cut out and mark the garments. In hindsight I should’ve made a paper pattern like I usually do because I needed to draft alterations onto one down the line and it would have been handy to have already had a paper pattern on hand.

February 15:
I spent the day assembling the muslin. A muslin is the first draft of the garment, its not meant to fit the actor perfectly but rather to act as a template for alterations during a fitting. By having the actor wear a muslin during a fitting, you can observe how it fits them and can then decide if it needs to be shorter, longer, wider. Then once all those decisions and alterations have been finalized, you can take the alterations back to your paper pattern so that you have a properly sized pattern for cutting the final fabric out of.


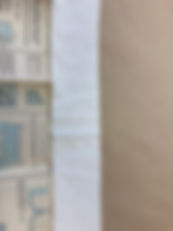
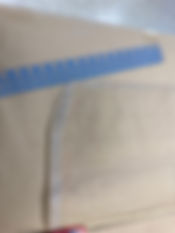
Here I’ve sewn the shoulder seams together and attached the collar to the neckline. You can see in the third picture how the facing for the bodice has been sewn into place by folding it over and attaching the collar across it, which is a pretty clever way of killing two birds with one stone. You can also see that I’ve clipped and ironed the seams towards the collar. Clipping curved seams like a neckline makes it easier to line the collar up against it. The seams act as ease making it so that the curve can be flattened out for sewing, but doesn’t lose its shape as a curve entirely. In the last picture you can see how I’m following the pattern directs for the collar interior facing. I’ve stitched a 3/8″ line along the bottom of the collar that I can use as a fold-line for pressing and turning the bottom of the collar up so that it will match up with the bottom neckline seam on the inside of the vest.


Here I’ve attached the collar facing to the collar. I’ve also clipped the corners and graded the seams to make it easier to turn the collar over. To help turn over the collar and give it a crisp finish I used this tailoring tool, the pointed end helps to poke the corners of seams out into crisp seams on the outside.

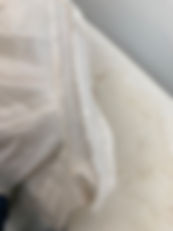
Here you can see the collar flipped right sides out, and in the first picture you can see how I used a small whip stitch to secure the turned edge of the collar facing to the neckline. If you zoom in on the first picture you can see how the collar facing meets up with the neckline stitching to conceal the stitching line. During my stitching I experimented with different needle lengths to see which needle it was easier to sew this stitch with. I found that the longer needle allowed me to have more control over my stitch spacing and stitch length compared to the shorter needle. However it was easier to tie-off my stitching with the shorter length needle.

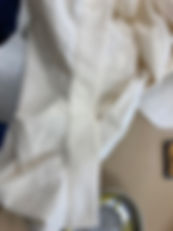
Next I sewed the hem facings onto the vest panels, ending my stitching lines where the sides of the vest curved to meet. Then I clipped and graded the seams to reduce any interior block when I turned the facings to the inside of the vest to conceal and raw edges. In the third picture you can see how once the facings are turned to the inside, the hem facing will be hidden behind the center front facing, making for a much cleaner finish. To secure the facings for the muslin I just used a running stitch because it wasn’t worth the labor to slip-stitch the facings together just for the mock-up.
February 17:
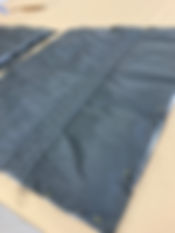
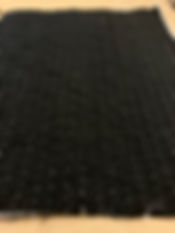
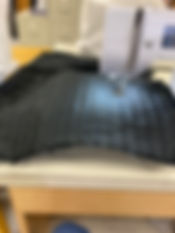
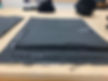
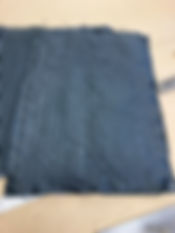
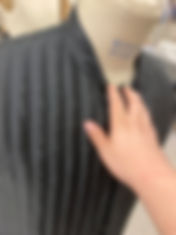
Unfortunately after finishing the mock-up, scheduling conflicts meant that the actor I was making the vest for would be unavailable for a fitting until just before the beginning of spring break. With this in mind I began making a sampler for different quilting patterns that we could use on the final vest. This research into quilting also gave me an idea of how much batting I would need and how much the fabric would shrink in size when quilted. Marilyn advised me to try basting the seams onto the sampler first to help prevent the fabric from slipping while I was quilting it. After basting the horizontal lines I sewed onto them with white bobbin thread and a black top-thread. This would showcase how using a different color thread on the black fabric could alter how the quilting would be read onstage by a viewer. I didn’t baste the vertical or wavy lines because between the first lines of quilting and a walking foot, there wasn’t much risk of the fabric shifting and puckering at the seams. After sewing the sampler I positioned it vertically and horizontally to see how that affected the read of the patterns from afar. I also flipped the sample so that the white bobbin thread was visible to see how that could be used to generate visual interest. After consulting with the designer he decided on the vertical brick quilting with black thread seen in the bottom-left corner of the first picture as appropriate for his vision of the vest. This sampler was made with 1/2″ worth of batting sandwiched between 2 pieces of taffeta. I think it’s pretty impressive how successive quilting compacts the batting drastically. In the top with only the straight rows you can see a lot of volume in the batting, which is just crushed in the bottom half of the sample piece.
February 24:
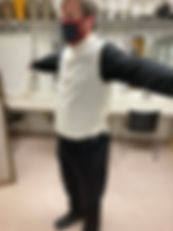
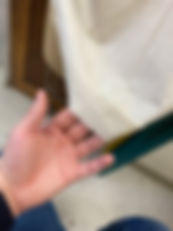
2 days before I had to leave for spring break we were able to schedule a fitting with the actor that Thursday at 5pm. During the fitting, under the supervision of the costume designer I made and labeled the alterations needed for his vest. The armholes hung over where the shoulder meets the chest and had to be moved back to be in line with the shoulder, the armholes also had to be widened and deepened or else the actor wouldn’t have been able to move his arms with an unrestricted range of motion. After closing up the center front of the vest we realized that the front panels needed to be lengthened by 1/2″ and the side seams needed to come in by a full 2″ to make the vest fit properly on the actor. The collar and back hem fit the actor and did not require alterations.
March 6:

After getting back to campus from spring break I immediately began working on the vest alterations. First I had to trace the paper patterns for the bodice from the pattern paper which I should have done at the beginning of the process to streamline the workflow. Then I added the 1/2″ onto the front hems and in the bottom picture you can see the 2″ folded over to create the new side seams, this was done to the back panel as well.
March 7:


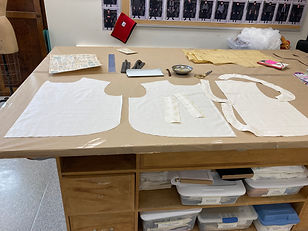
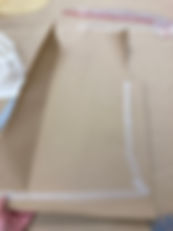
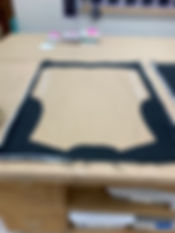
Next I had to alter the armholes and make sure that they still matched up when sewn together. To do this I had to finagle the vest with the applied alterations onto the paper pattern, pin them together, and trace the new armhole onto the pattern. With the new armhole traced I could cut away the excess material and then I lined the paper pattern pieces together to make sure that the curve of the armhole matched at the side seam, and that the side seams were still the same length. Next I creased the side and shoulder seams at 5/8″ which is the seam allowance for this garment. then I taped the seams together and pinned the seam allowances together to manipulate the paper to look like it had been sewn together. Then I placed it on a dress form that was the closest size overall to the actor and checked that the seams lined up and the new armhole looked like it would fit the actor. The reason that the armhole looks too large in the bottom right picture is because the paper pieces were freely hanging on the dress form and were sagging a little towards the camera. If I had pinned them to the form for the picture they would’ve hugged the dress form more and the armhole would have looked more natural. With the alterations made I could proceed with cutting out the quilt sandwich panels.


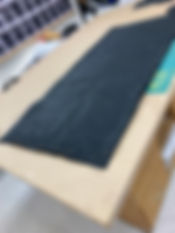


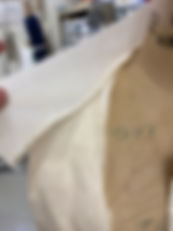
Here you can see me forming the sandwich. This sandwich is made up of a top layer of taffeta , 2 layers of batting to get the 1/2″ fullness needed for the quilting to stand out, and a final bottom layer of taffeta . First I cut out the layers of batting, I cut the batting out with a generous allowance because from my experience quilting the sample piece and advice given to me by Kevin and Marilyn, I could be certain that the final quilted panels would shrink by at least an inch or more and it would’ve been a real headache if the quilted panel was smaller than its corresponding pattern piece. After cutting out the batting I laid them out on top of the fabric to make sure I had enough fabric for three panels. Then I put the batting in between the taffeta which was folded over to form the sandwich. Next I laid my paper patterns onto the sandwich and pinned a generous allowance around them and cut the sandwich from the rest of the fabric.
After cutting out the pinned panels I then had to determine how I could get my pattern pieces to line up with the quilting lines of the vest. I was determined to create a professional look where the quilting lines continued across side and shoulder seams, and also matched up at the front to hide the center front fold of the vest. To do this I had the vertical lines originate from the center back fold line of the vest back panel, and then drew vertical lines every 1″ radiating out from that central line. Once the lines reached the side seams I subtracted the 5/8″ seam allowance from the edges of the panels and then lined the panels up. From this I could determine that the backs quilting line would end 3/4″ away from the side seam, which means on the front panels, the quilting lines would need to start 1/4″ away from the final side seam to have the quilting lines continue uninterrupted across the breadth of the vest.
March 8:
With the sandwich panels cut out and a full nights rest I began the repetitive task of hand-basting all of the panels together to make sure the fabric didn’t slip and pucker while quilting it.
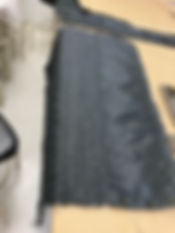


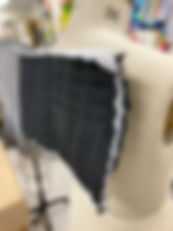
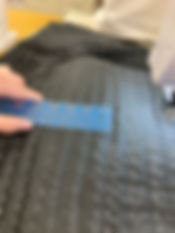
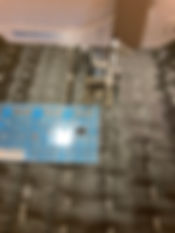
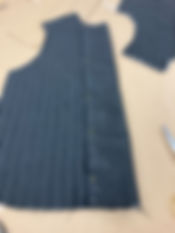
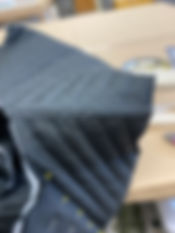
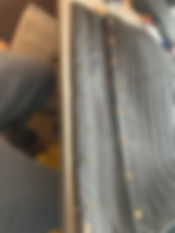
Basting was slow going at first, I started with the back panel because I figured it’d be helpful mentally to get the largest panel done first. With a very long and straight ruler and some chalk I began tracing the basting lines onto the panels. Immediately I realized that I couldn’t really trace more than one line at a time because the taffeta didn’t take the chalk well and the lines disappeared quickly while handling the fabric and basting it. For basting I used a double threaded needle and white thread to make sure I could see my basting lines. After I had done the first line I used a clear quilting ruler to space out each successive chalk line. Each line was spaced 1″ apart just like the quilting design that Kevin approved. The first panel was slow going, from drawing the line to threading the needle to basting along the line and over again it took close to six hours to completely baste the first panel. In the bottom right picture you can see how the lines I drew on the pattern match up with the basting lines. I also ended up pinning the the beginning and end of the basting that corresponded to the center back of the vest, that way I knew which line to quilt first to make sure everything lined up. In the bottom right picture you can also see how the panel has shrunk in height and width after basting, bringing the raw edge closer to that of the pattern pieces side seam.
March 10:
I continued basting panels, with the back panel finished I moved onto one of the front panels. Thanks to my experience the previous day, I had gotten faster at basting these large panels and this panel only took four hours to complete. Again I pinned the seam in the middle so I would know which basting line to start with when I machine quilted the panels.


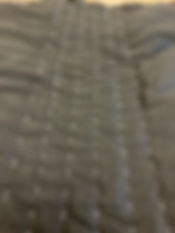


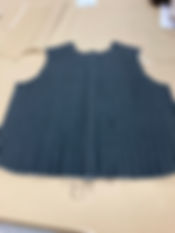
Here you can see how this panel has also shrunk slightly with basting, making me thankful that I cut each sandwich with a generous allowance around the pattern pieces. In the bottom pictures you can see me checking to make sure that the 1″ distance between basting is consistent between panels and also that the basting lines lined up with the lines drawn on the pattern piece. I’m very proud of the accuracy and consistency of my work at this stage.
March 13:
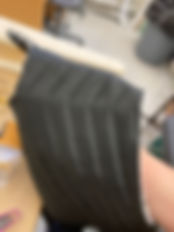
With 2 of the 3 panels basted together, I needed a mental break to regroup before tackling the last panel. So I began quilting the basted panels together. I used black thread to hide the stitching as much as possible since that was what the designer wanted, and a walking foot to quilt the final lines because it would enable me to be as accurate as possible. One of the most important skills in sewing is being able to sew a straight line and being able to follow a stitching line accurately. Thankfully the walking foot came with a quilting guide that I could screw onto the back of the foot, the guide is just a bent piece of metal attached to an arm that can slide left and right, allowing the user to put the guide at whatever specific distance they wanted from the foot. I adjusted the guide so that the inside edge of the kerf of the guide would be exactly 1″ from where the needle was. This meant that as long as I sewed the first line dead straight and just used the guide from then on, all the quilting lines would be exactly 1″ offset from the center line, ensuring a consistent result. I also made sure that my machine-sewn lines were offset from my basting to make it easier to remove my basting stitches in the future.


In the bottom pictures you can see how I rolled the panel up to fit in the harp of the machine while quilting each line. While sewing I made sure that all my seams began on the same edge and ended on the same opposite edge, so that way even if one of the layers shifted slightly during sewing, it would keep shifting in the same manner for each successive seam instead of shifting one way, and then the other, and then another way which would have lead to more puckering and an inconsistent result. After every stitching line I took a ruler and measure along the seam line at multiple points to make sure there was a consistent 1″ distance between all the seam lines. I also began removing the basting stitches after every seam at one point because it was easier to remove as I went than sitting down and removing the basting stitches all at once.
March 14:
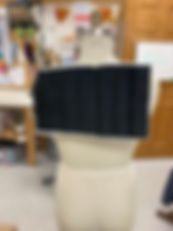
I continued quilting the 2 basted panels, and once they were finished, I lined them up to make sure that the final quilting lines matched up just as perfectly as the basting lines
Here I’ve folded one of the panel up on itself like an ‘s’ shape and placed it onto the other quilted panel to check for consistency in my quilting. I’m pleased to see that the quilting lines seem to meld together and that at a glance it’s difficult to make out the top edge of the folded panel from the quilted panel flat on the table which is a testament to the consistency of my work.
March 15:
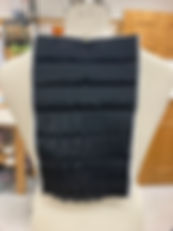
Finished basting and quilting the last panel and lined all three panels up to make sure the quilting all matched up.


March 16:
Began laying the patterns onto the quilted panels. I made sure that the center back lined up with its corresponding quilting line and cut that out first. Next I cut out each front panel, making sure that the side seams and quilt lines matched up how I needed them to. For some reason some of the quilting lines I drew on my pattern pieces weren’t quite as accurate as my sewing but thankfully the facing fold line matched up exactly on a quilting line, meaning that my center front overlap would perfectly line up with the quilting lines. After cutting out the panels, I marked the wrong sides with chalk and for the front panels marked which seam line was the facing fold line so that I wouldn’t forget it.


March 17:


To remove any unwanted and unnecessary bulk from the front of the vest, I took out the quilting lines from the edge to the fold line, then I cut off all the excess batting and the interior layer of taffeta from the facing so that I was only folding back a single layer of fabric. I then turned the raw facing edge under 1/2″ and pressed it so set the crease, making the facing edge exactly 1/2″ from the nearest quilt line.


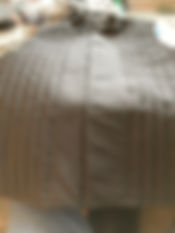
Next I sewed the panels together at the side and shoulder seams. I’m extremely pleased with how consistently the vertical lines move across the side seams of the vest, the center front of the vest, and I’m pretty happy with how closely the lines match up at the shoulder seams.
March 21:
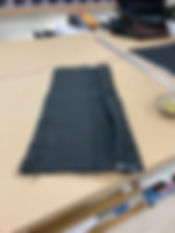
Since I had never drafted my own facings before I asked Kevin to explain how it’s done. It’s actually a very simple process, you draw a line where your seam allowance is, and from there you measure inward on the pattern the thickness you want your facings to be and then add another allowance for the turned edge. I made the total length of my facings 1 5/8″ and traced and cut them right out of my pattern paper because it was quick and I wasn’t going to being reusing this pattern piece in the future.

March 22:


With the facings sewn onto the hem of the vest, I began finishing the shoulder and side seams by hand before moving onto the facings. I removed any excess internal bulk and turned all the raw edges under and slip stitched the seam allowances to the body of the vest. My first attempt I turned the fabric under on a diagonal which lead to it being much more wavy, but with that practice the rest of my seams were very flat and the slip stitching gave a handsome finish. In the last picture you can see the right side of the vest showing that my stitching doesn’t go through to the outside.
March 23:
More slip stitching.

March 24:
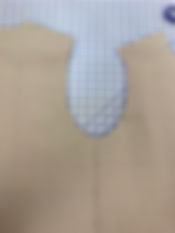
I attached the collar and armhole facings to the vest. After attaching the armhole facings I had to clip and trim the seams to allow for more ease and less bulk. I then slip stitched the facings to the inside of the vest. Reflecting on it I know now that the collar needed either an interfacing or some sort of filling to give it structure because it’s not very rigid and would most likely crumple under an actors chin.


March 25:
With the facings stitched down, the last thing I needed to do was to add the snaps to my vest. Thankfully I remembered that I had been given a snap setting plier as a gift a few years ago, so I didn’t need to try attaching the snaps with a punch and anvil. Before starting on the vest I used a piece of test fabric that I had laying around to try putting in snaps. I read the directions for the plier and found the process to be simple and effective. After putting snaps through the entire sandwich I tried attaching a snap to just a single layer of taffeta; This didn’t work. The snap was much stronger than the fabric and when I tried pulling the snap apart from another snap, the fabric tore before the snaps became uncoupled. This meant that I would need to reinforce the fabric somehow while minimizing the amount of bulk I was adding to the center front closure. At this point I should have consulted the costume rendering to see how the designer had envisioned the snap placement and visibility, because I didn’t consult the costume rendering I put half the snaps on incorrectly and if this was going onstage I would have had to figure out how to remove the snaps and redo them correctly to match the designers vision.

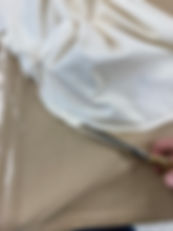
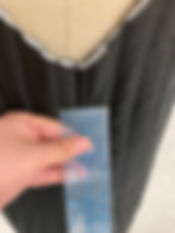
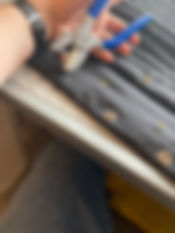
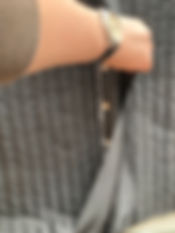
Instead of consulting the rendering which showed six visible snaps on the center front opening and two snaps on Caesar’s collar, I tried instead to hide the snaps from being visible on the outside and did not add any snaps to the collar. I tried a couple different spacing’s for the snaps but eventually settled on a snap every 3″ for a total of eight snaps. With the center of the first snap about 1/2″ from the bottom edge of the collar. I used a tape measure and chalk to mark out the center of each snaps placements. The taffeta kept slipping on the chalk, in the future I would probably use a very light pencil mark. After attaching the first row of female snaps to the right, under lapping vest front, I had to figure out how to transfer the markings to the opposite side. When putting on smaller snaps, one trick is to insert a sharpened pencil into the center of the snap and twirl it around depositing graphite onto the snap. Then you simply press the opposing fabric onto the snaps and press down, leaving little graphite marks for the centers of your connecting snaps. Unfortunately these snaps were too wide and deep for that to be possible, but I figured out that as shown in the second picture below, I could still press the mating fabrics together and use a pencil to mark the indentations that appeared on the other side, which is exactly what I did.


Next I took a strip of quilted cloth and ironed it as flat as I could on a low heat so that I didn’t melt the taffeta, and cut it to length so that it would fit inside the overlapping facing and act as a stabilizer for the snaps. The stabilizer is shown in the first two photos below. Once I had it in place I pinned the strip only to the single layer of facing, because I still had to maneuver the pliers into place to attach the snaps and needed to be able to move the body fabric out of my way so I couldn’t accidentally punch through it.


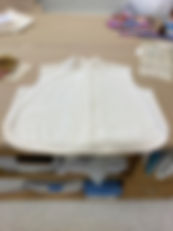
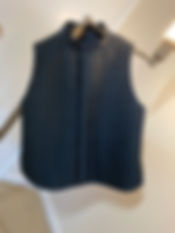
Here you can see the vest completed and the facings slip-stitched down to secure them and prevent any fraying.
Conclusion and Assessment:
Throughout the process of constructing this vest, I had to experiment with new sewing techniques and rely on the years of experience working in the costume shop to inform my construction process. taffeta is a slippery fabric and requires a lot of pinning, but from previous experience working on Christopher’s red and gray jacket from ‘Curious Incident’, I knew that I had to pin within seam allowances as much as possible to reduce and chance of pinholes showing up in the finished garment. From working on Rona’ silk vest for ‘Spelling Bee’, I recognized how useful a walking foot was in taming slippery fabrics. I experimented with different needle lengths and thread lengths to make sure that I was using the most comfortable tools for the type of hand sewing I was doing. Basting and slip-stitching can be done with the exact same needles and thread, but it made my life easier using the right tools for the job. I had never quilted anything like this before but because of the practice I had in hand sewing and machine sewing, I was able to hand baste and then machine quilt the panels fairly quickly and most importantly very accurately. I think it would be fair to say that the vest and cape I made for Julius Caesar accurately reflect the culmination of the sewing skills and experience I’ve gained working in the costume shop.
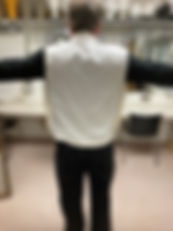
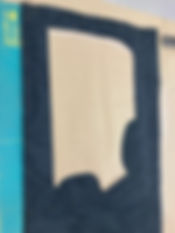
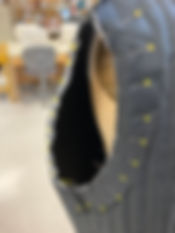
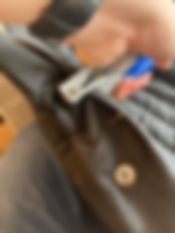
Not everything about the vest is perfect, while I’m proud of my work there are parts of the vest that aren’t quite up to snuff for various reasons. The biggest flaw visually is that I hid all my snaps when the costume rendering specifically shows visible snaps on the center front and the collar. If I had been able to complete the vest in time for opening it would have been imperative for me to fix this. Another flaw is that the collar is just two layers of taffeta fabric with no internal support or structure, meaning that it would’ve collapsed under an actors chin onstage. Finally another structural flaw came from me hiding the snaps. Since the snaps on the overlapping facing are only attached to the interior facing and stabilizer strip, and not to the body of the vest at all, when the vest is worn and pulled taut across the chest, it actually folds back on itself, making the closures visible as in the photo below.

In conclusion I’m proud of this vest and I’m willing to stand behind my work. Part of standing behind my work is acknowledging and addressing the mistakes I made in construction that make this vest inappropriate to go onstage in it’s current form as compared to the original costume rendering. I see these mistakes as a learning experience for me to use going forward in my career.